Current page Secondary Capture DICOM Workflow

DICOM workflow

Secondary Capture DICOM export and review

spectrIm-QMRS can create DICOM Secondary Capture objects from the Clinical Viewer window or from selected local image files. The created objects are associated with the last loaded spectroscopy DICOM examination, so patient, study, and UID context remain tied to the examination being reviewed.

The clinical reason for sending spectroscopy results back as DICOM is introduced in the DICOM crash course for clinical spectroscopy.

Why a spectroscopy DICOM context is required

Secondary Capture export is enabled only after a spectroscopy DICOM dataset has been loaded. This prevents orphan screenshots or local images from being sent without patient and study context. The loaded spectroscopy DICOM supplies the Study Instance UID, patient tags, and UID root used to derive new Series and SOP Instance UIDs for the Secondary Capture object.

The exported object uses the DICOM Secondary Capture SOP Class and Explicit VR Little Endian transfer syntax. The user can choose whether the object is sent to a configured DICOM node or saved to disk for later inspection.

Clinical Viewer screenshot export

1. Create a screenshot DICOM object

After loading a spectroscopy DICOM examination and creating a result view, such as an NAA map in a tumour patient, press the 2 DCM screenshot toolbar button. spectrIm-QMRS captures the current Clinical Viewer window and prepares it as a DICOM Secondary Capture object using the last loaded spectroscopy DICOM context.
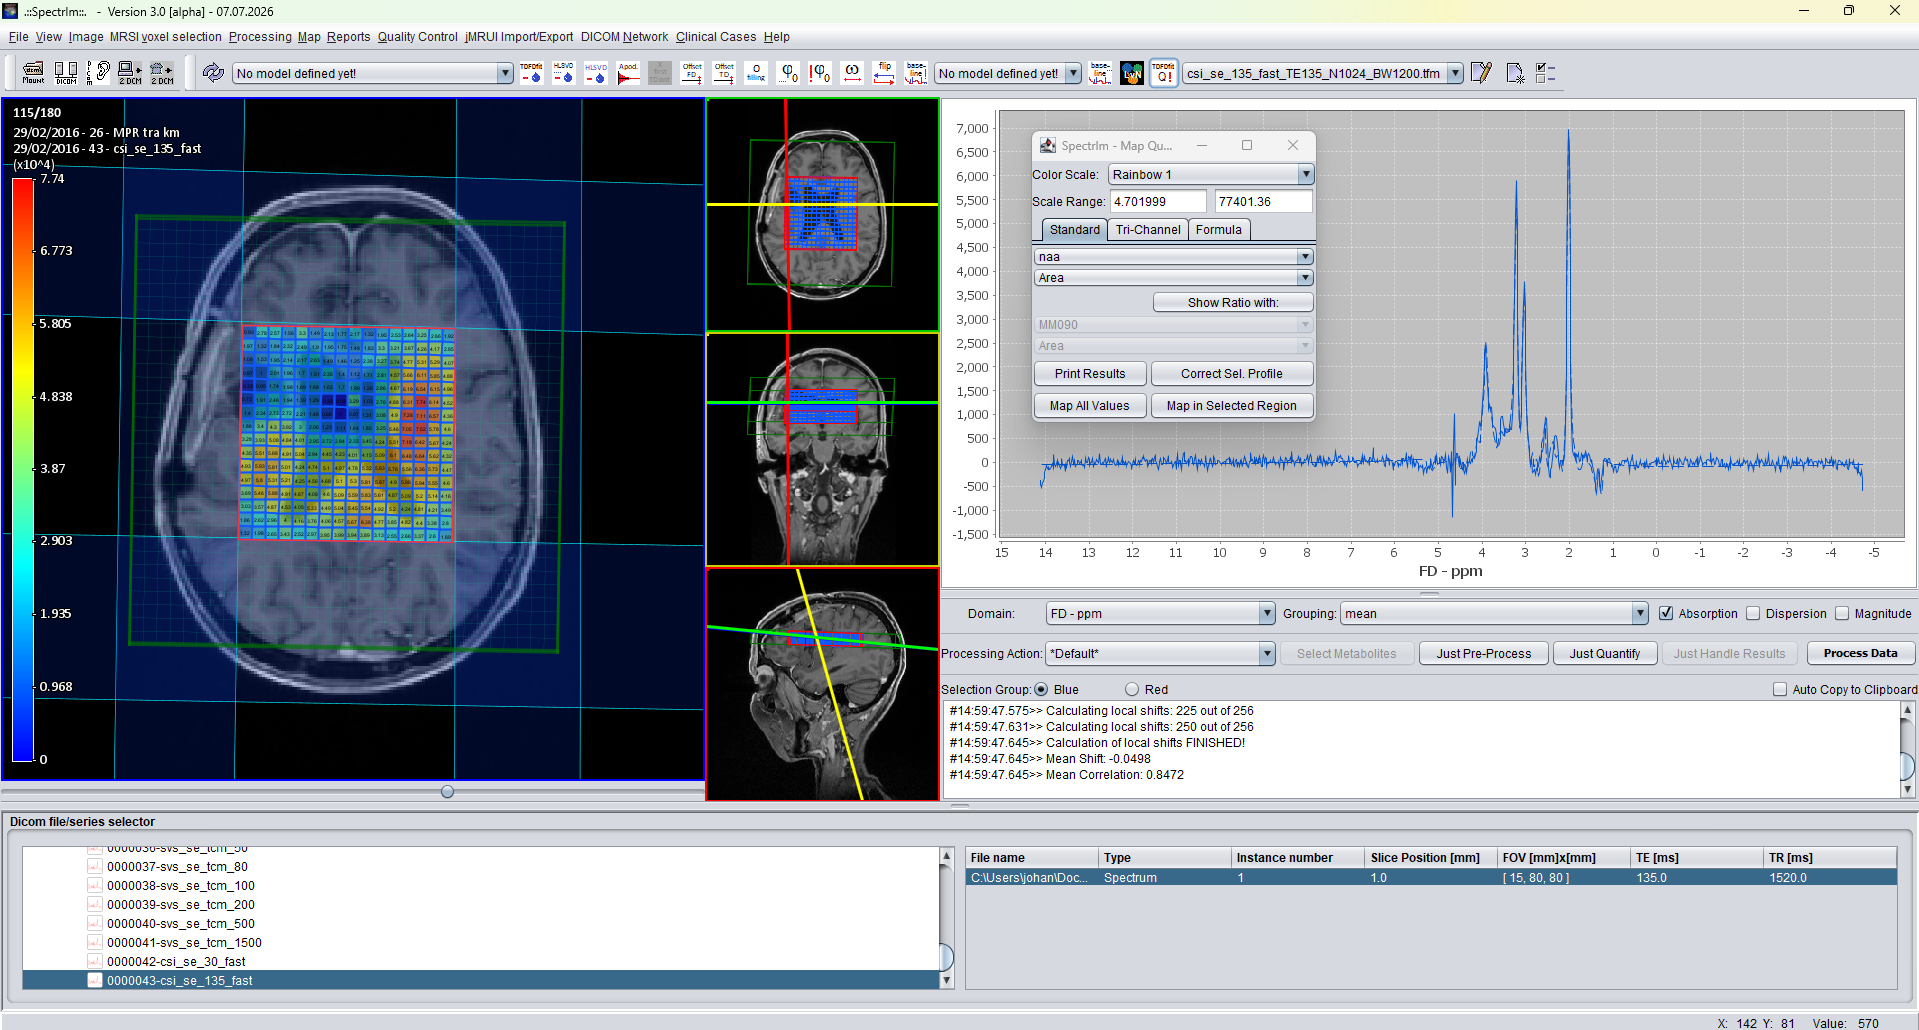
Clinical Viewer showing an NAA MRSI result map before using the 2 DCM screenshot toolbar button

2. Choose send or save

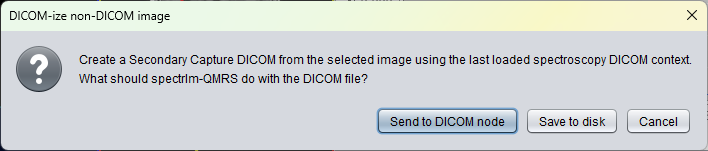
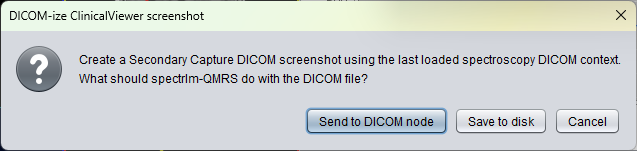
The application asks what should happen with the new DICOM file. Choose Send to DICOM node to transmit the Secondary Capture by DICOM networking, choose Save to disk to write it to the local file system, or cancel the action.

Dialog asking whether to send the Clinical Viewer screenshot to a DICOM node or save it to disk

3. Send to PACS or another DICOM node

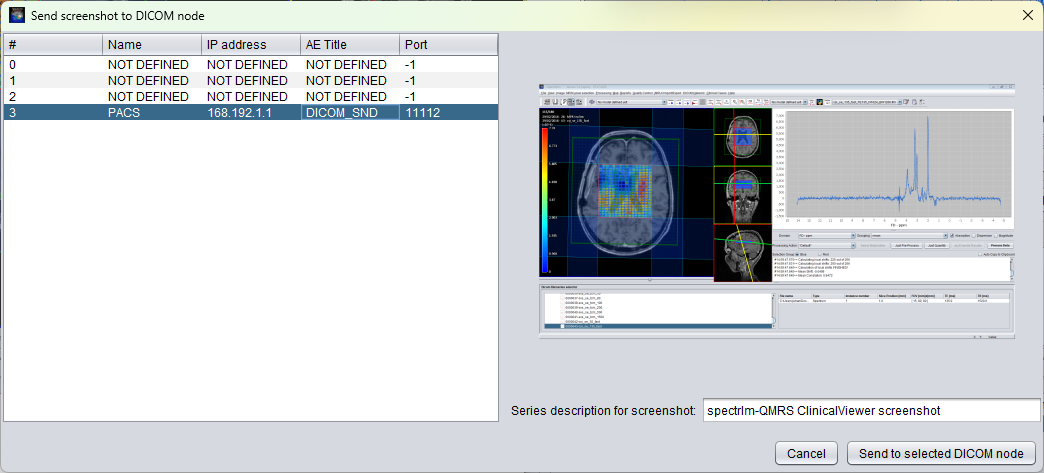
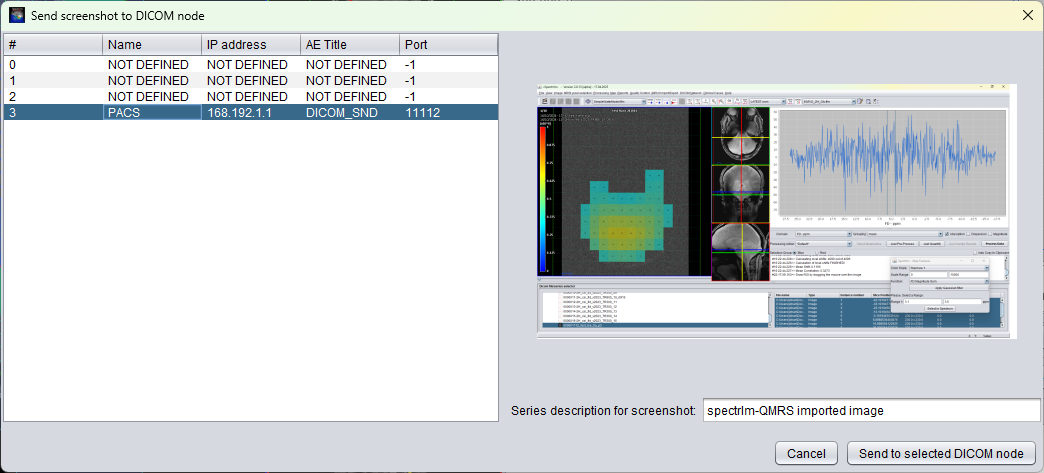
If Send to DICOM node is selected, the send dialog shows the configured DICOM nodes and a preview of the screenshot. Select a valid reachable node, for example a PACS entry with AE title, IP address, and port, optionally adjust the series description, and then send the DICOM object.

DICOM node selection dialog for sending a Clinical Viewer screenshot Secondary Capture to PACS

4. Save to local disk

If Save to disk is selected, the standard file save dialog opens. The user chooses the target folder and file name, and spectrIm-QMRS writes the screenshot as a local DICOM Secondary Capture file for later inspection, archiving, or manual transfer.

The screenshot export remains disabled until a spectroscopy DICOM examination has been loaded, because patient, study, and UID context are required for a clinically meaningful DICOM object.

DICOM-ize local image files

Local PNG, JPEG, BMP, or GIF files can be converted to Secondary Capture DICOM objects with the 2 DCM image toolbar button. The selected image files are still associated with the loaded spectroscopy DICOM examination; this action is not available without a loaded DICOM context.

1. Select one image or a stack

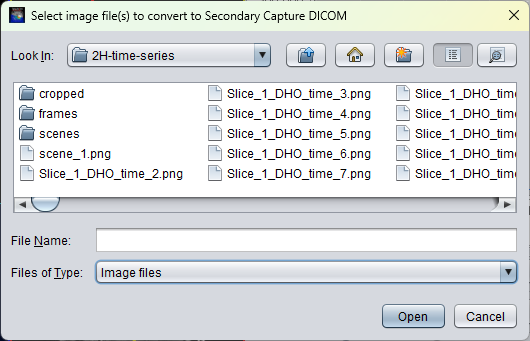
Press 2 DCM image to open a multi-file image chooser. Select one image or several image files that should be DICOMized as Secondary Capture objects.

Multi-file image selection dialog for choosing local image files to convert to Secondary Capture DICOM

2. Preview and confirm each image

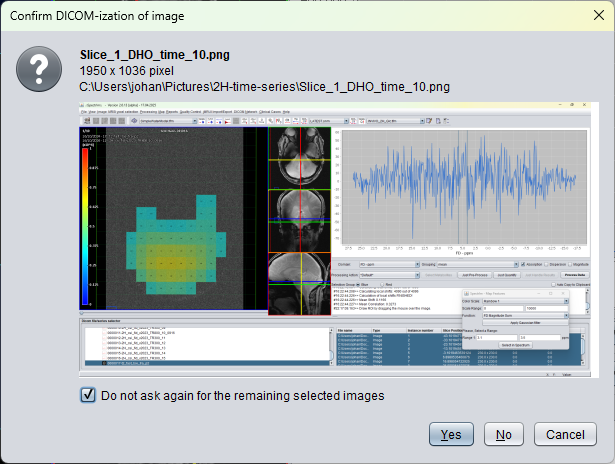
After selection, spectrIm-QMRS previews the image that will be DICOMized. The user can confirm the current image, skip it, cancel the remaining conversion, or use the checkbox to avoid being asked again for the remaining selected images.

Preview dialog for confirming DICOMization of a selected local image

3. Choose send or save

For each confirmed image, the application asks whether the new Secondary Capture DICOM object should be sent to a DICOM node, saved to the local file system, or cancelled.

Dialog asking whether to send the DICOMized image to a DICOM node or save it to disk

4. Send to PACS or save locally

When sending is selected, choose a valid reachable DICOM node, such as a PACS entry, and then send the object. When saving is selected, the standard file save dialog opens so the generated DICOM file can be written to the local filesystem.

DICOM node selection dialog for sending an imported image Secondary Capture to PACS

Review mounted Secondary Capture series

Mounted DICOM directories may already contain Secondary Capture series, for example screenshots or imported image captures created by spectrIm-QMRS. When such a series is double-clicked in the Patient/Study Browser, spectrIm-QMRS opens the captured image in a separate viewer frame instead of loading it into the spectroscopy processing workflow.

The separate frame shows the rendered image, series description, patient name, and source file path. Large captures are displayed in a scroll pane so the full image can be inspected.

Practical notes

DICOM node setup

Sending a Secondary Capture to PACS or another workstation requires a reachable remote DICOM node with correct AE title, host, and port settings. Hospital firewall and scanner/PACS registration rules still apply. The clinical background for these DICOM network requirements is summarized in the DICOM crash course.

Clinical safety

Screenshots and imported images can contain patient identifiers or clinical annotations. Handle exported DICOM files according to local privacy and clinical-documentation policies.